Building a Giant WiFi LED Sign
Have you ever felt like your living room is missing that certain something? Well, how about a 1000-LED powered sign that makes your guests wish they had brought their sunglasses to your party?!
This project is less about “why” and more about “why not”. Sure, you probably don’t need a DIY lamp on steroids with the possibility to turn your flat into an urban lighthouse, but imagine how much fun you could have if you had one.
Here are some examples of what I did. Let’s start with the scrolling text:
An absolute party classic is the beerpong scoreboard including beer animations when a team scores:
Sorry for the blurry video there, my phone’s autofocus can’t quite cope with the sudden brightness changes. For more relaxed nights, a simple rainbow animation comes in handy:
My favourites are the stroboscope and the random-color stroboscope where each flash changes the sign’s colors. Both are incredibly bright and make you feel like you’re in the club having a proper rave. Unfortunately, I can’t show them here on the website because the fast color flashes might cause problems for readers with epilepsy.
Enough on how awesome this project is, let’s talk about how I built this. I got the initial idea for the project when I read Bigger is better: Build an Arduino-powered monster scrolling LED sign for about $15 a foot by Josh Levine, so the mechanical and electrical part of the build is strongly inspired by Josh’s approach.
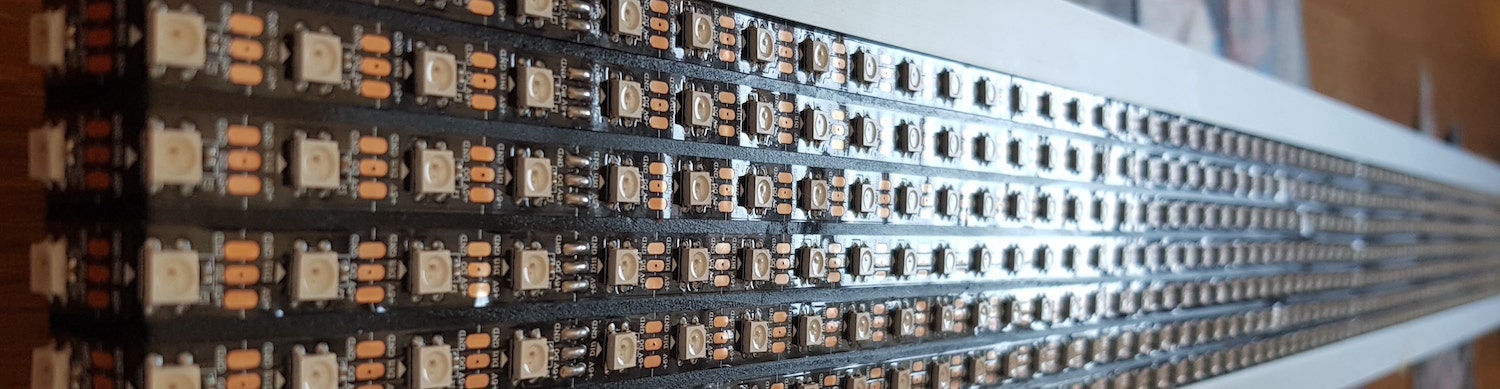
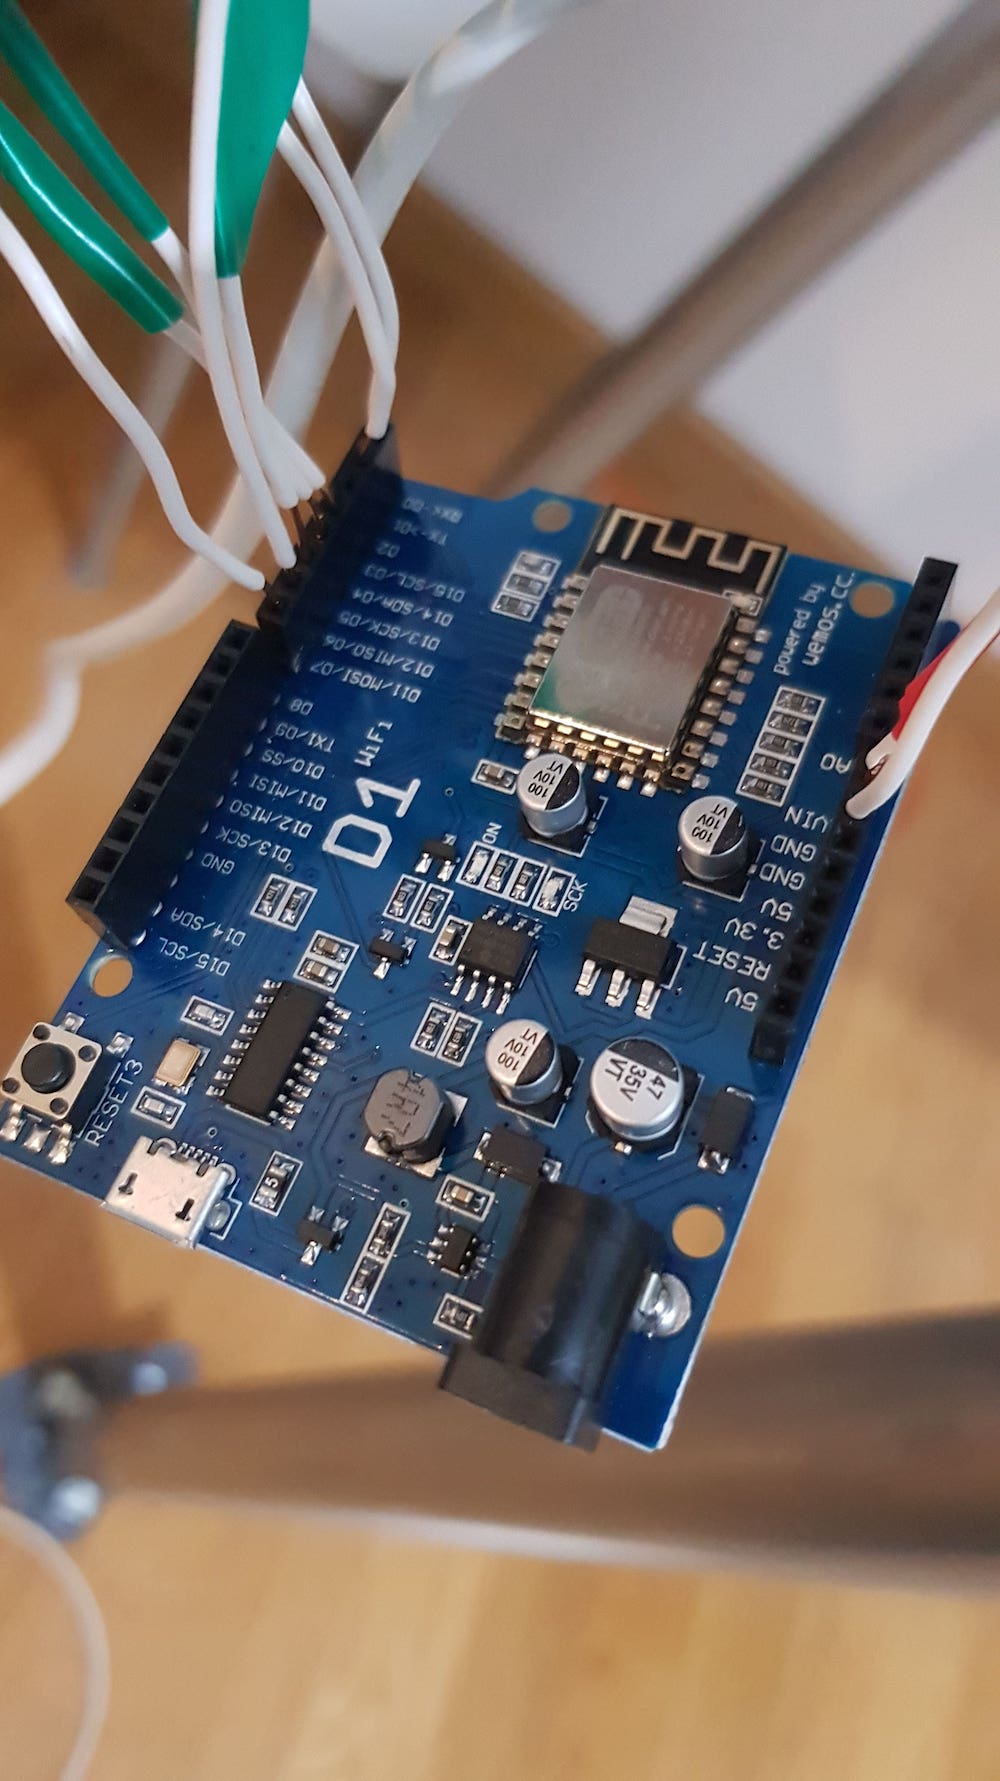
Inspired by the blogpost, I went to Aliexpress and ordered 15 metres of programmable WS2812b LEDs, a gigantic 300W power adapter, and a WEMOS D1 microcontroller. Around 5 weeks later, the parts arrived and I could get started. I first measured all parts and made a plan for the LED sign layout.
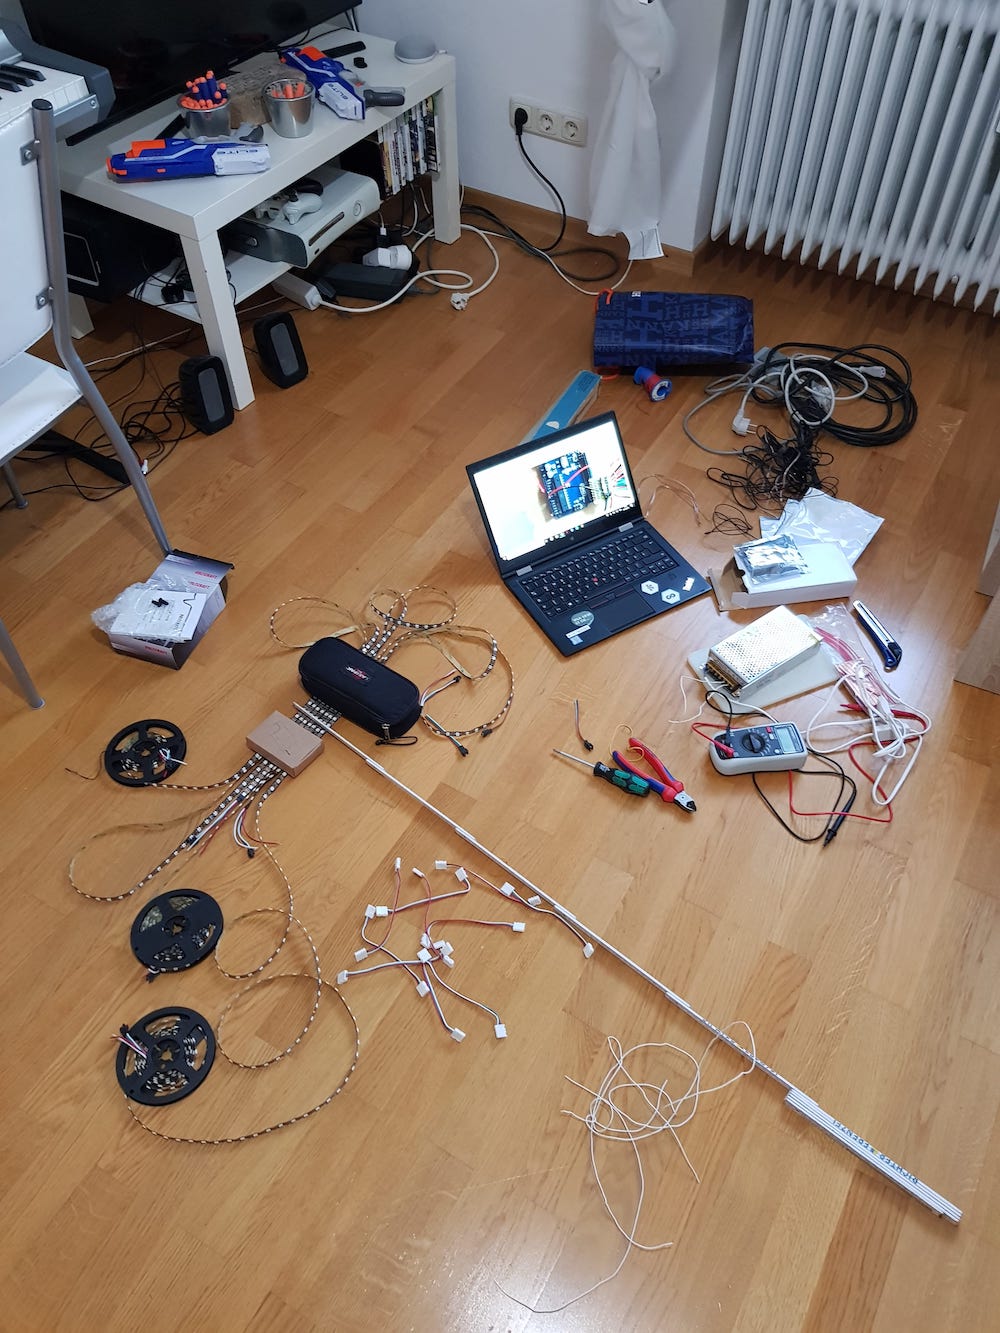
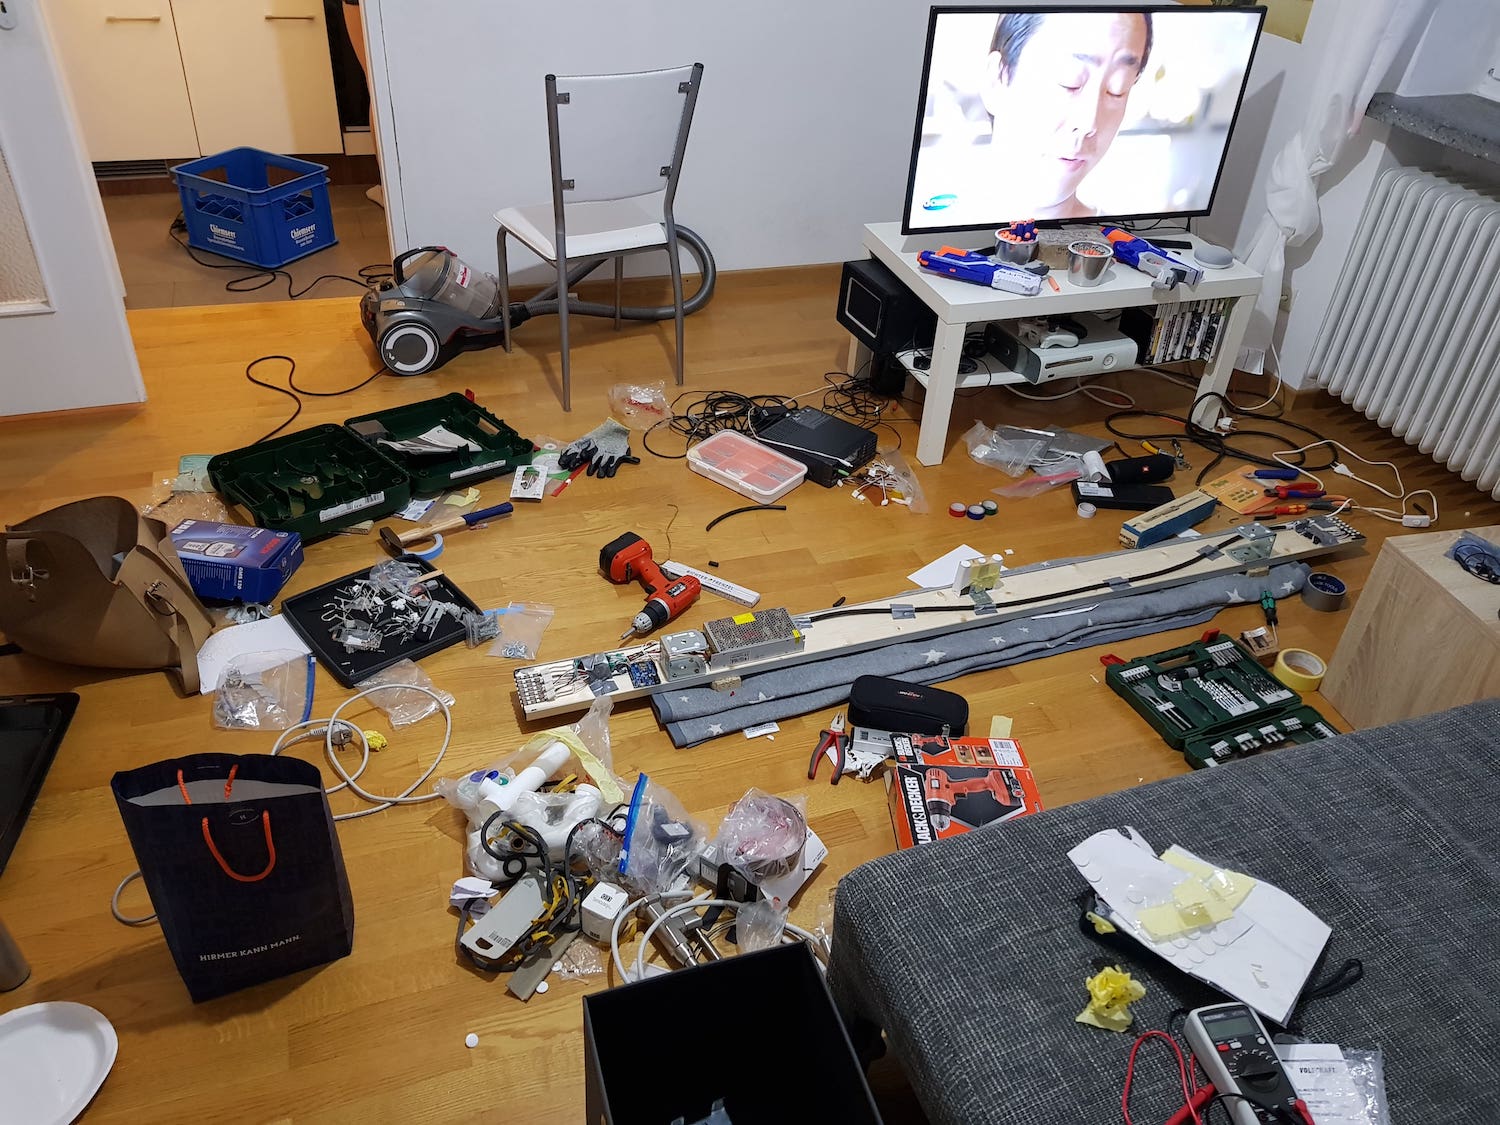
A few evenings into the project and my flat looked like this:
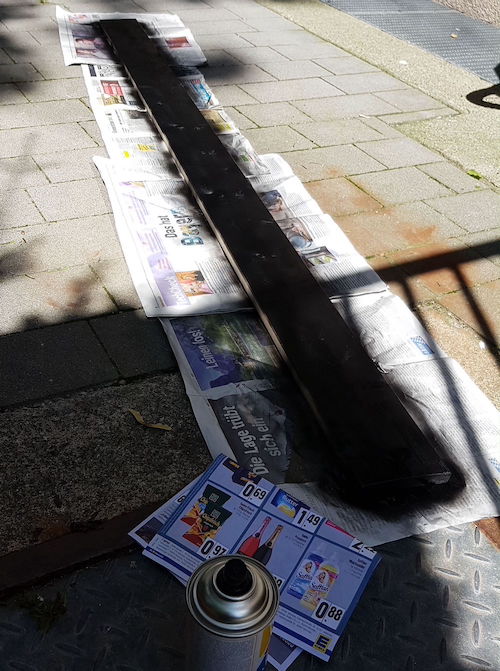
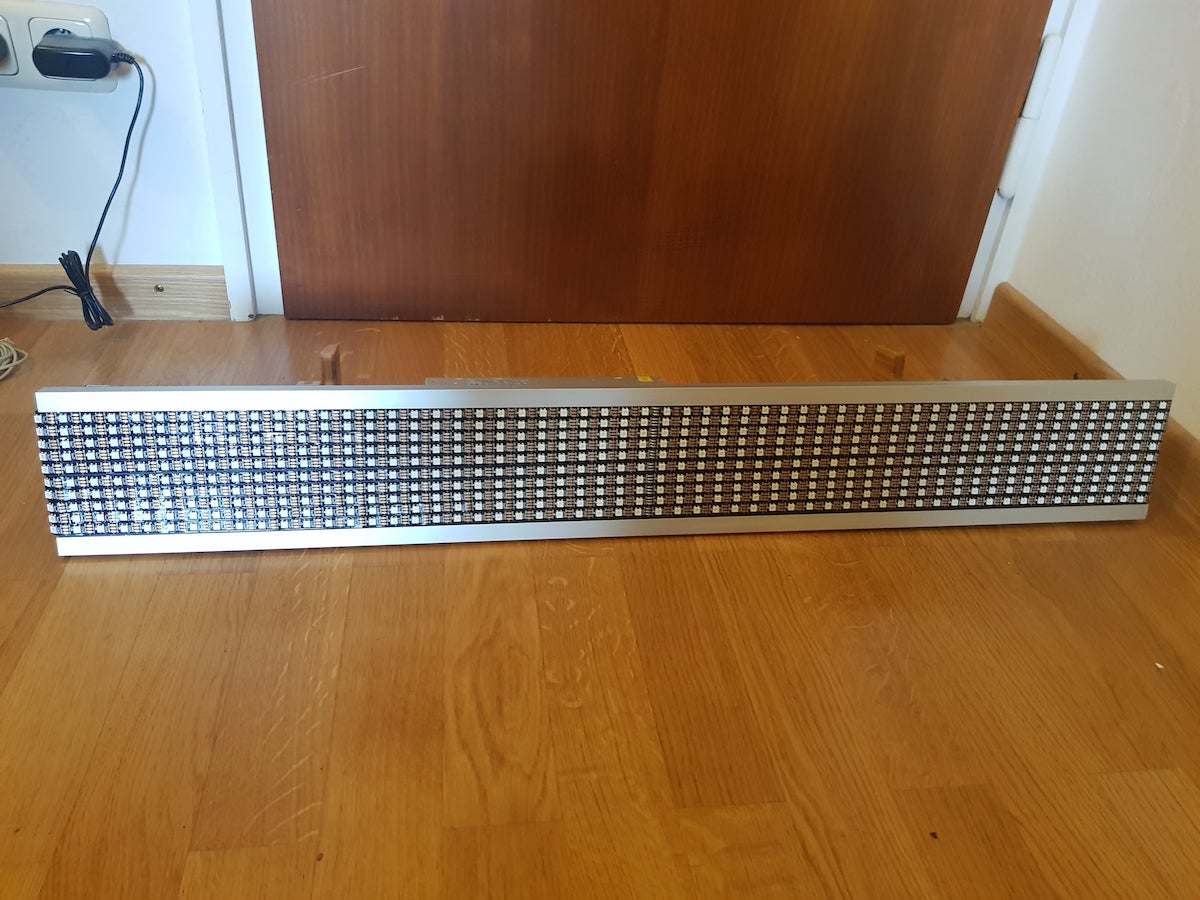
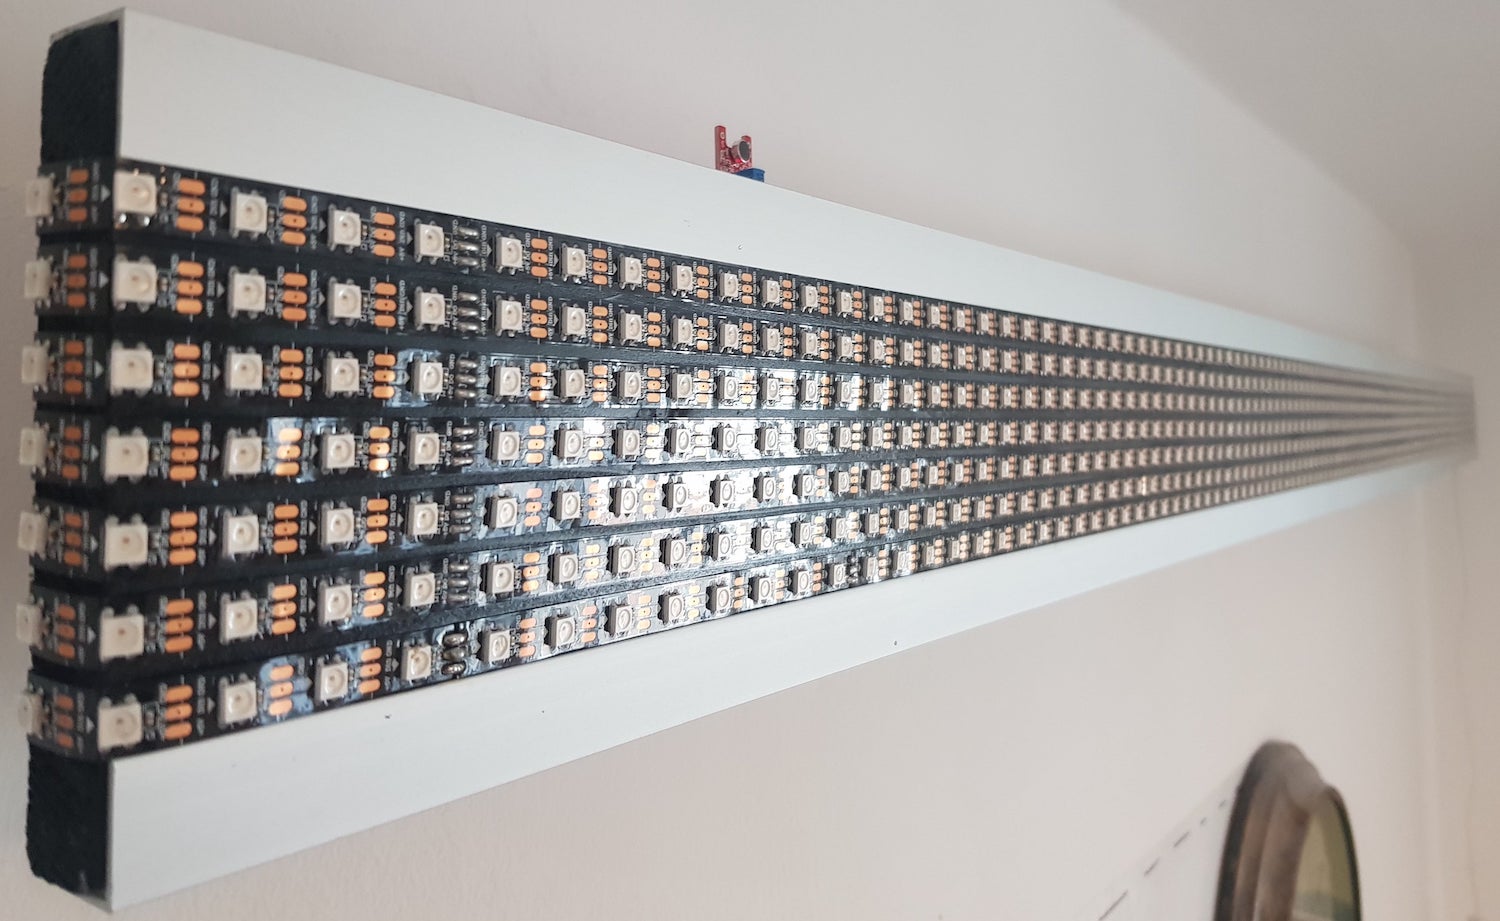
But first things first. The base of the LED sign is a roughly 2 metre long plank of wood that I spray-painted black:
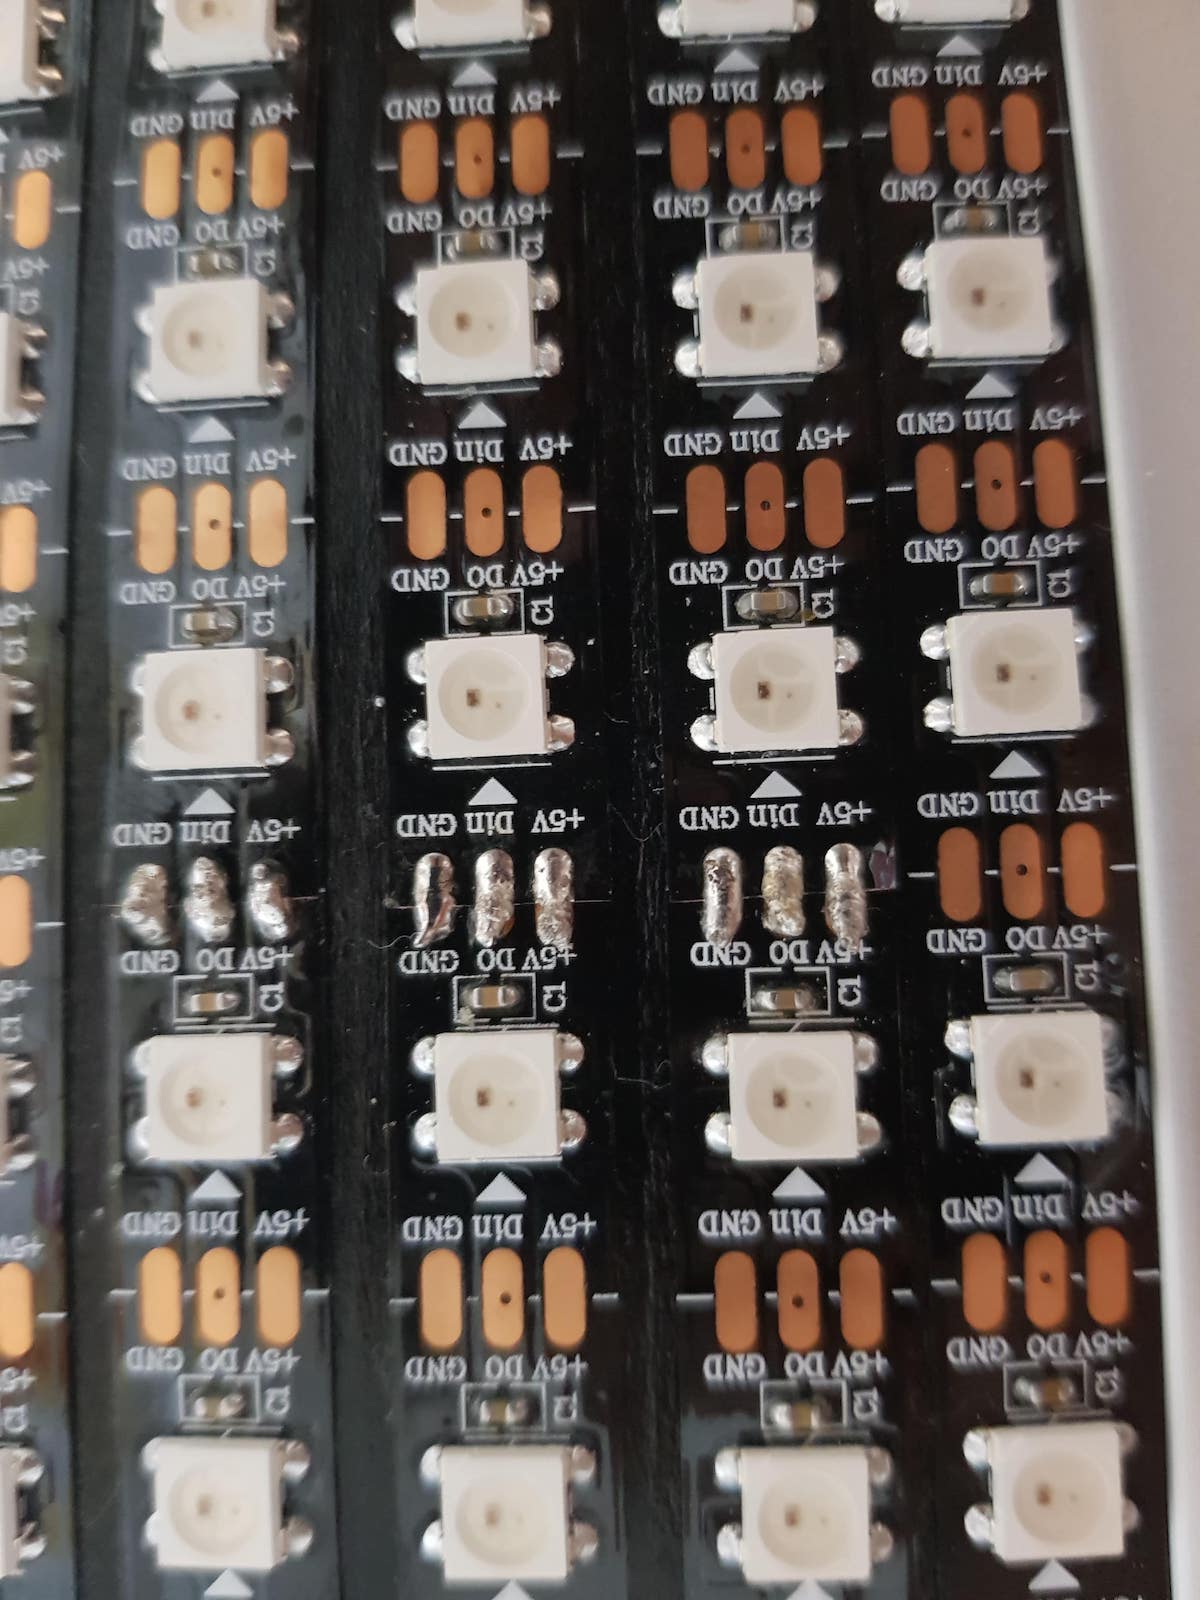
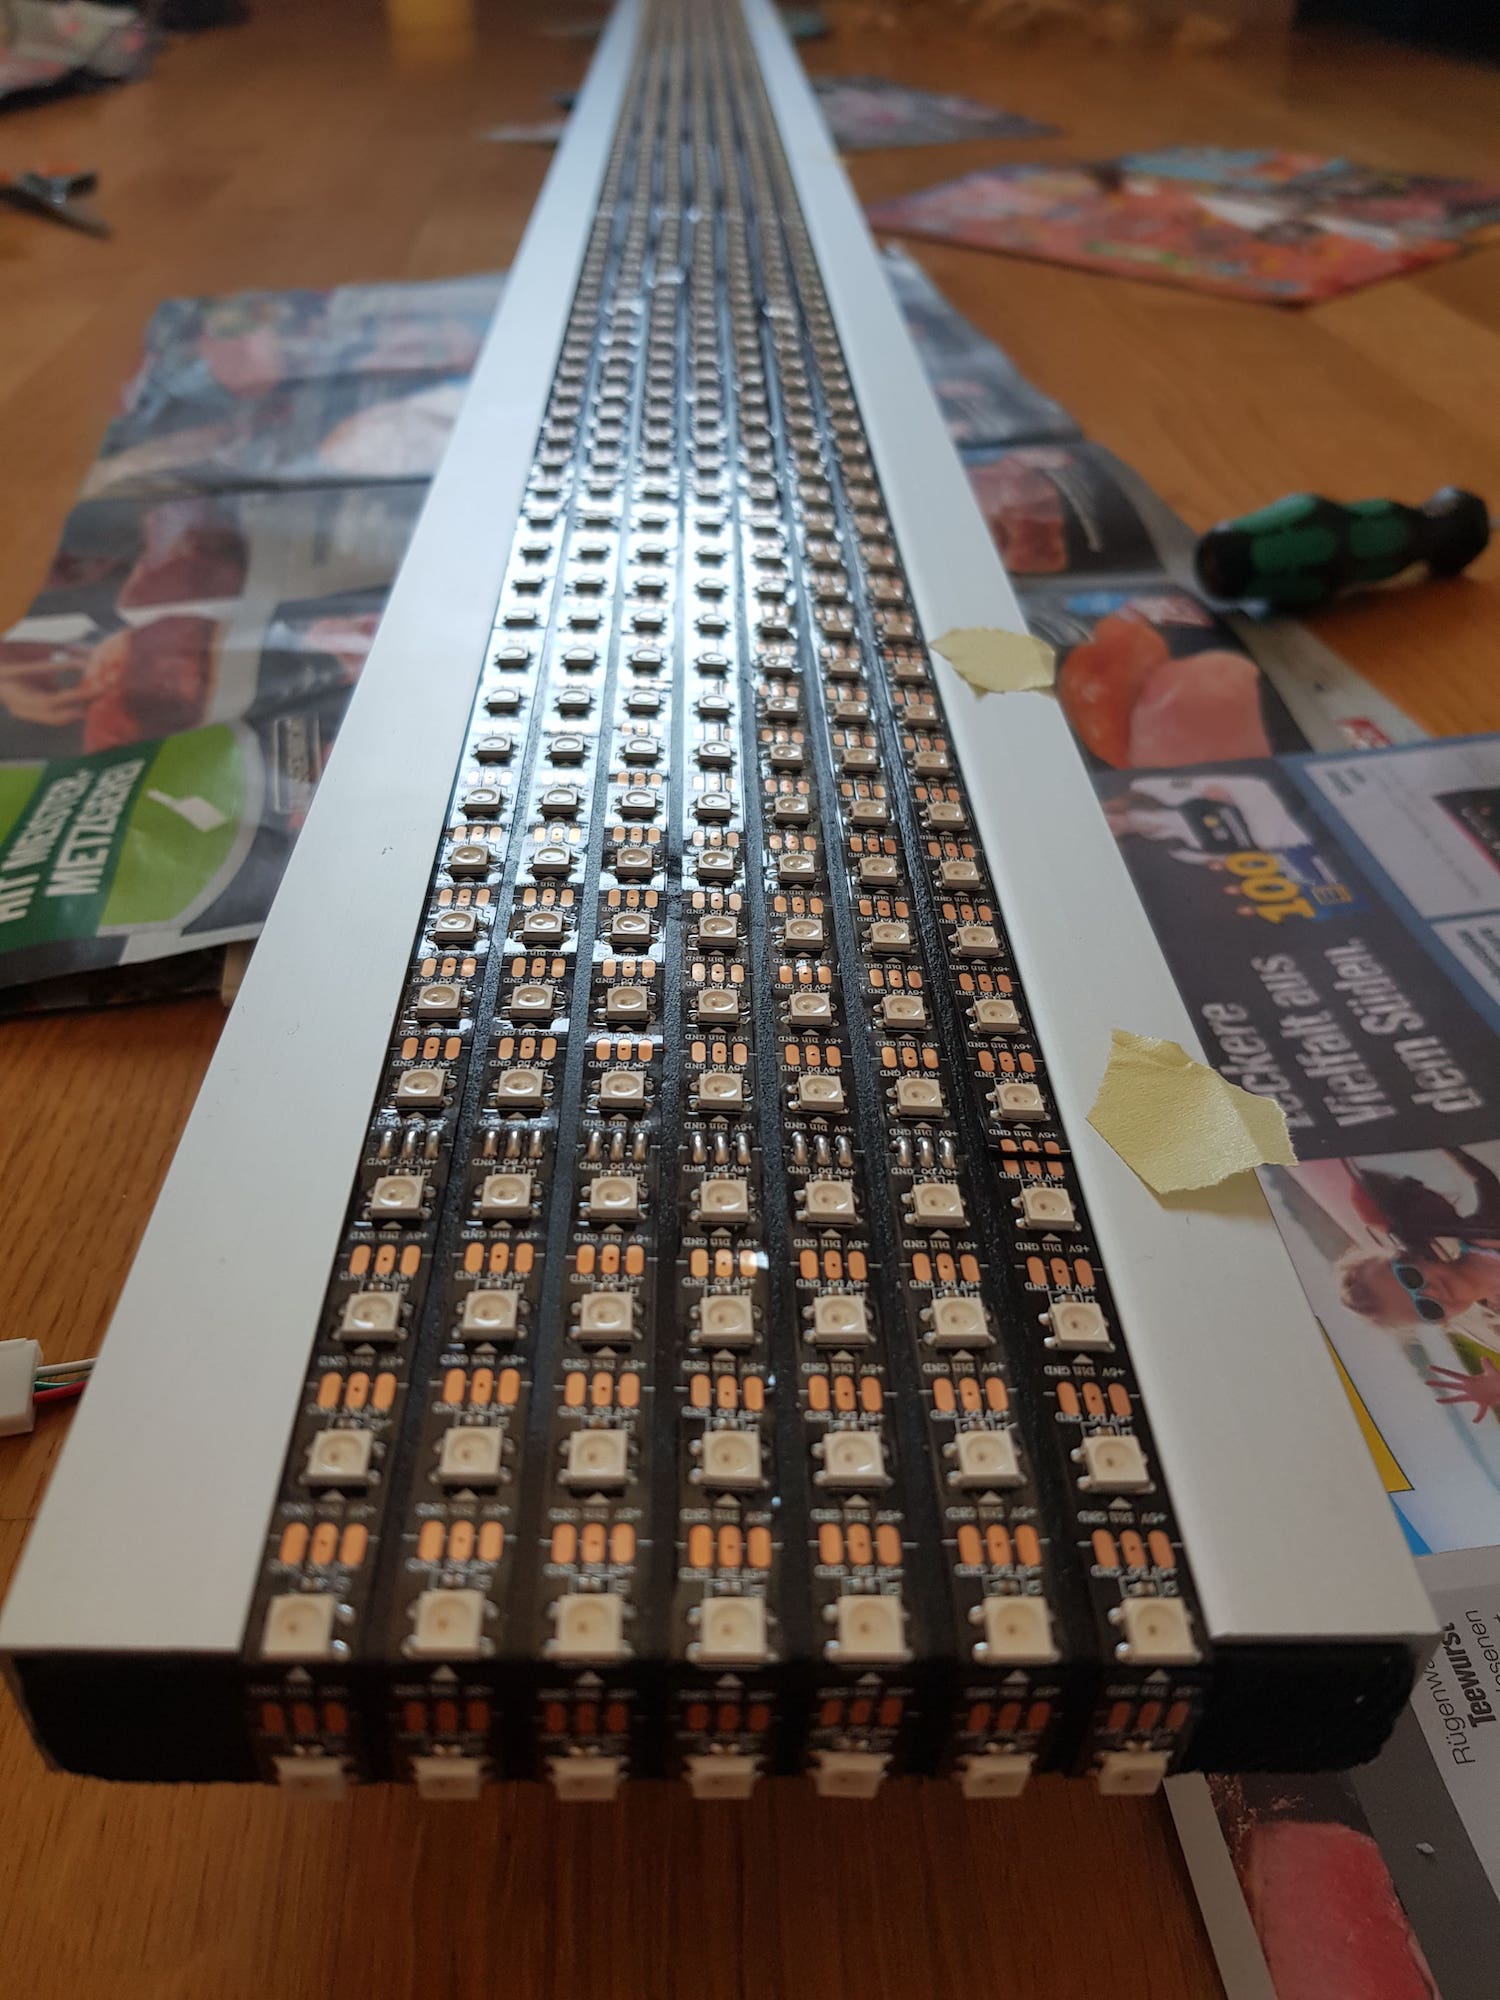
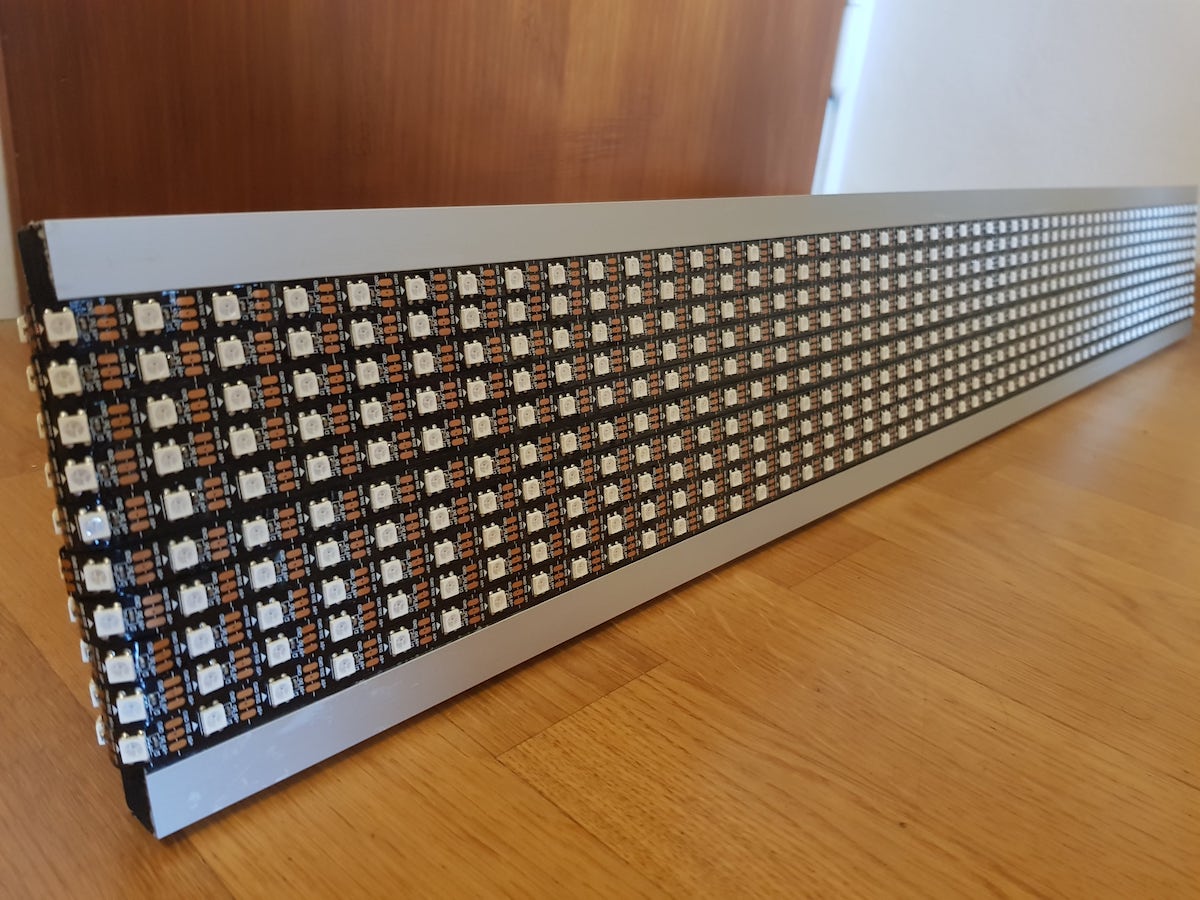
I then glued aluminium angles to the top and the bottom of the sign to make it look better and add some stability. The LED strips are self-adhesive, so I glued 7 lines of them onto the painted wooden plank. I started out with 3 five-metre strips, so I had to cut some of them into pieces and solder them back together. This was one of my first projects that required soldering, so the delicate connections took a few tries, but I managed to get them all connected in the end:
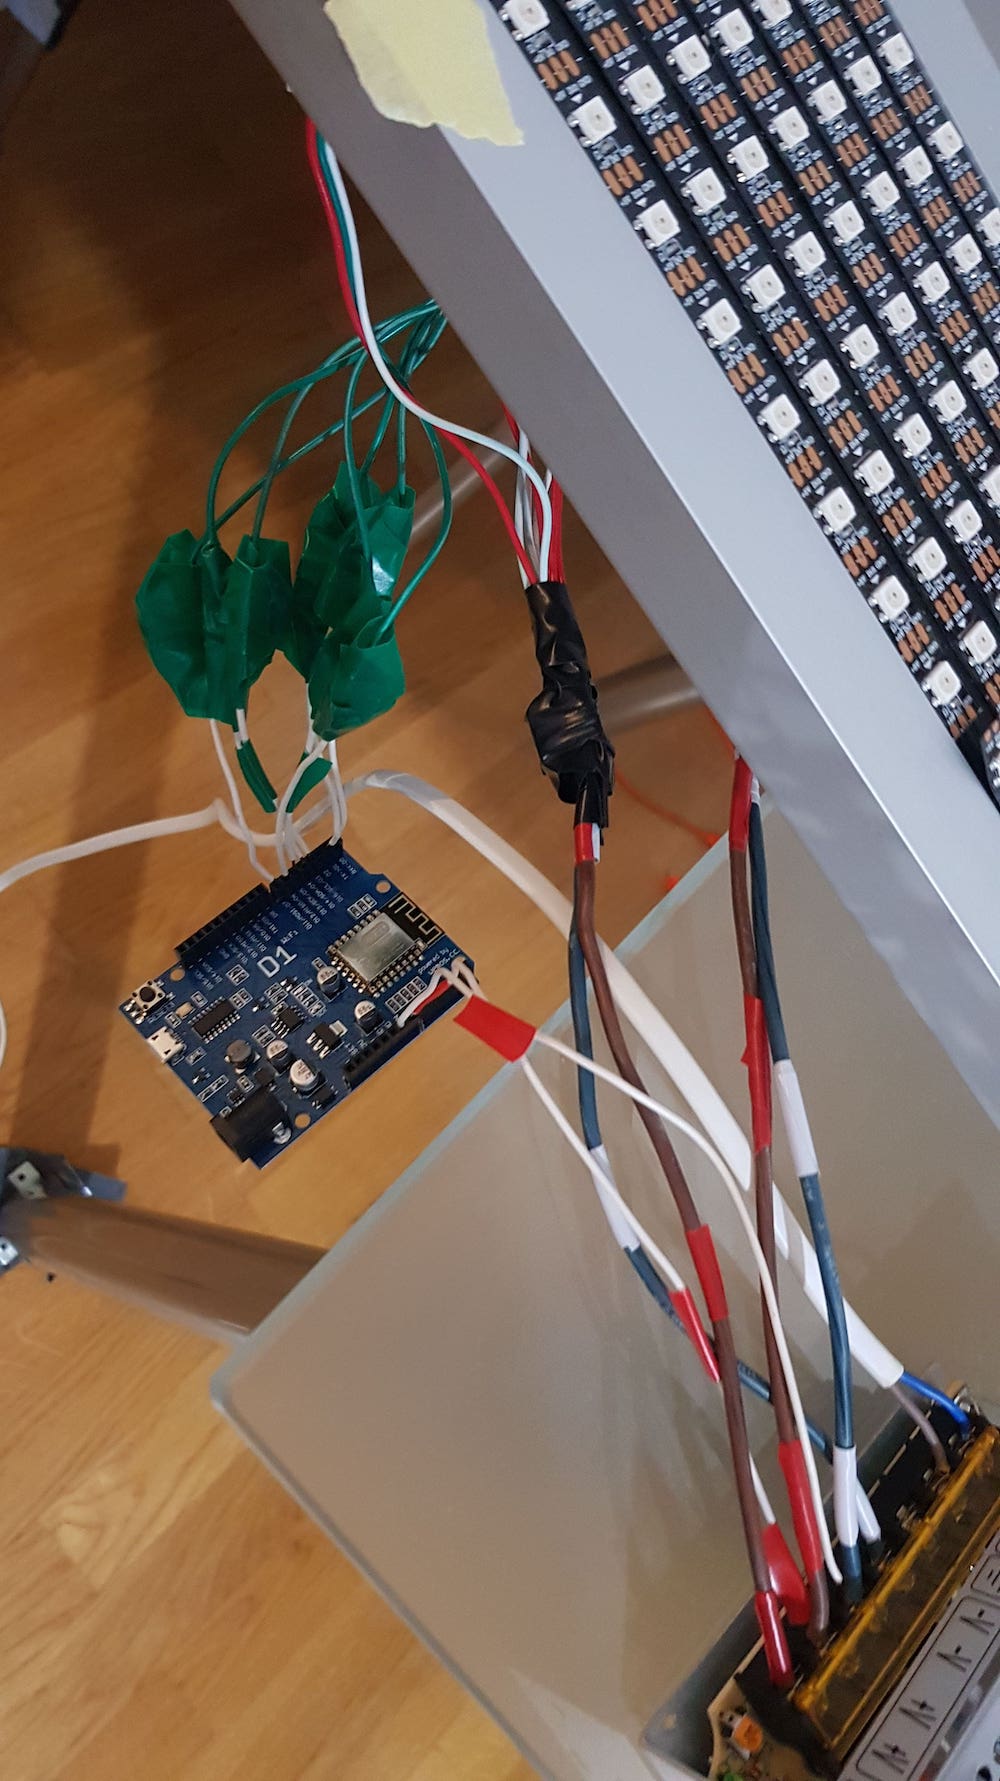
I fixed the power adapter and the controller to the back of the sign using screws and tape and added some u-shaped angles to mount the LED sign on the wall later.
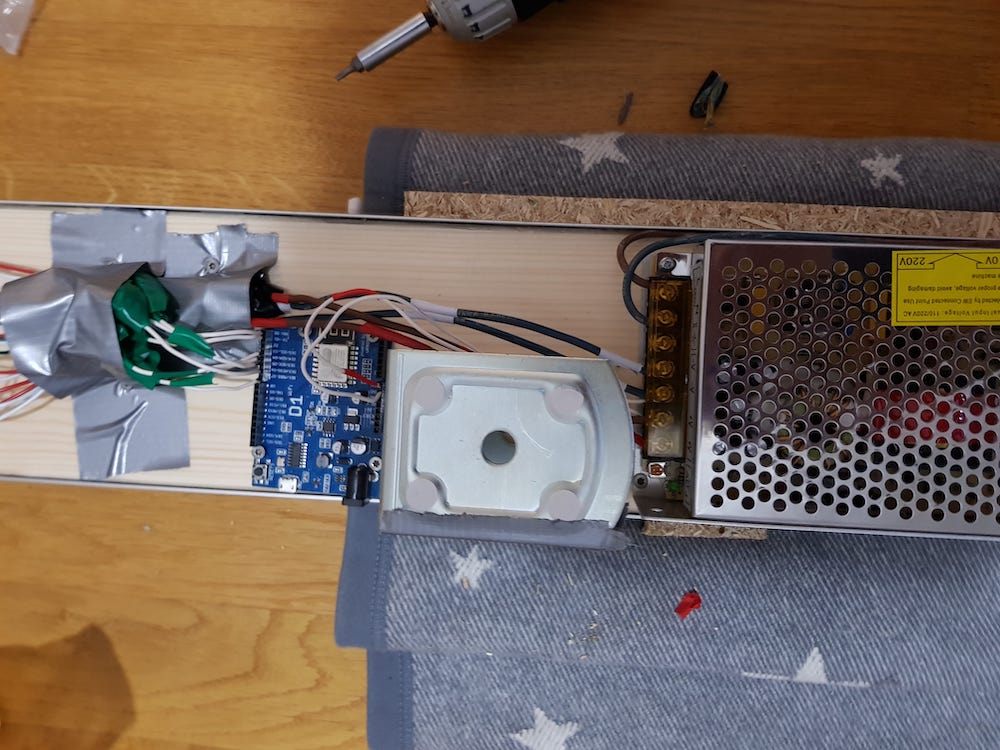
To add sound-dependent animations like flashes of light that are synchronized with the music currently playing, I added a microphone chip with the sensor facing into the room.

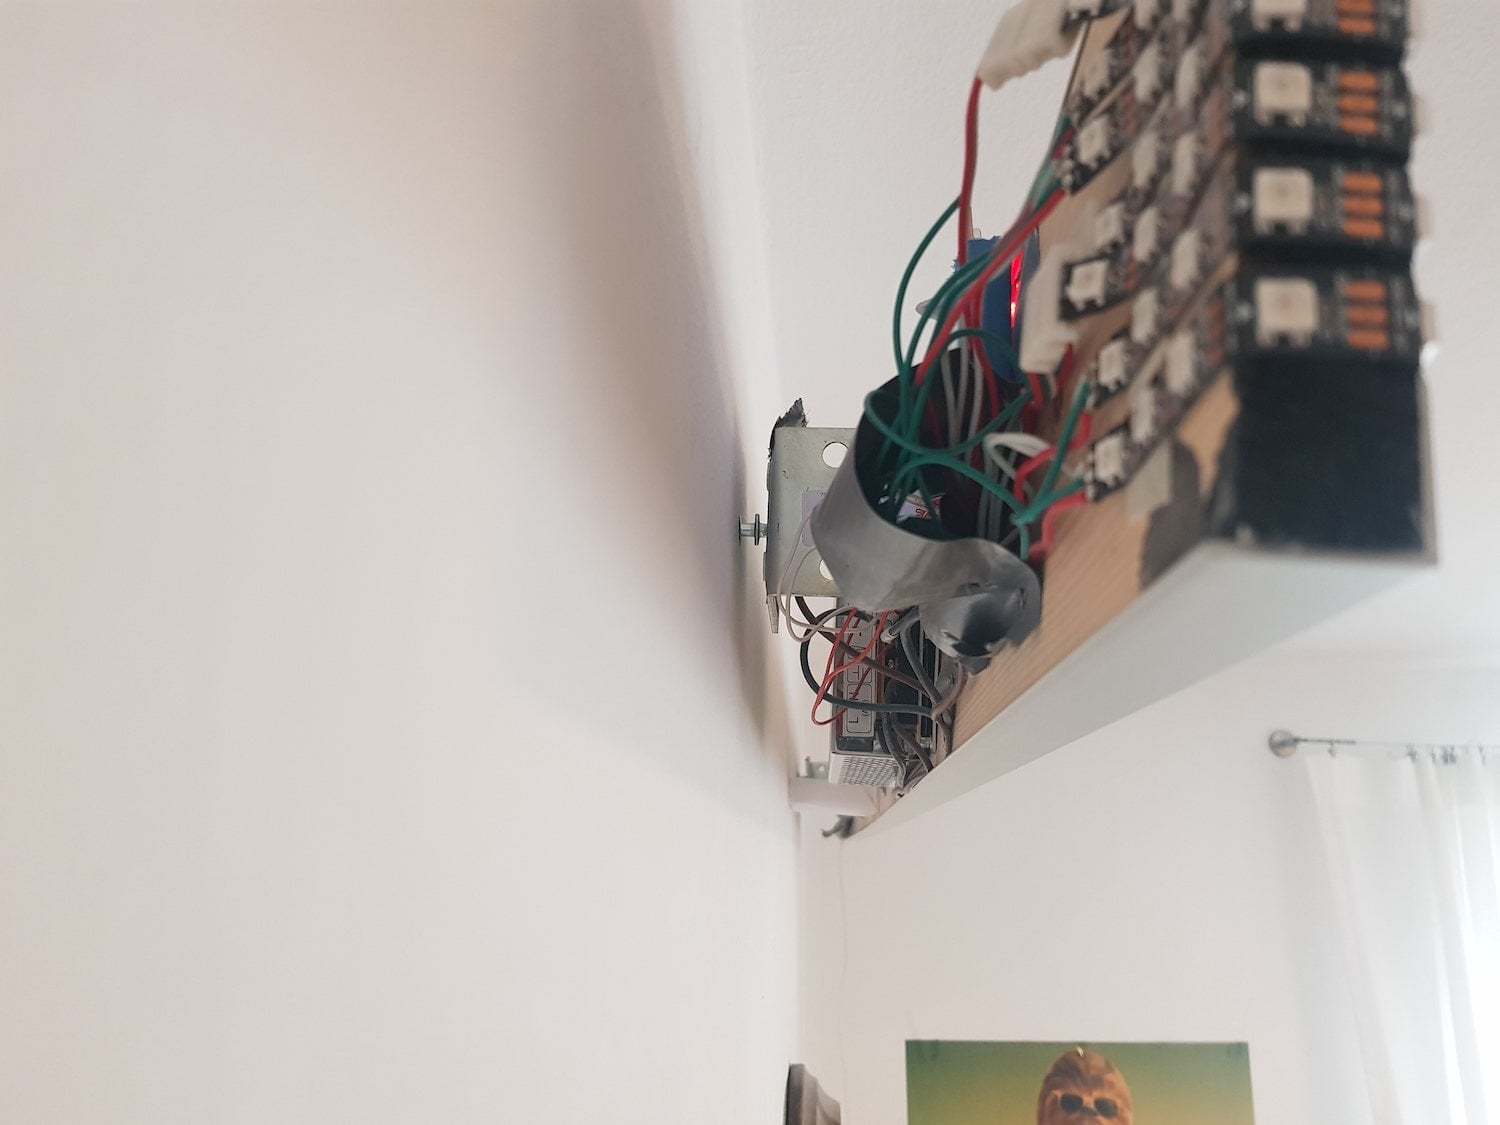
With all the hardware assembled, I screwed some hooks into my wall and made sure all cableing is nicely hidden behind the sign:
As you can see, I wrapped the LED strips around the edges of the sign all the way to the backside to get a nice effect of text or animations appearing from the back of the sign or “scrolling” all the way around it.
From the front, this is what the LED sign looked like at this stage:
With the hardware part of the build completed, I went on to figure out the electrics. I first made sure that each LED line connects to one of the controller’s digital OUT ports. The LEDs draw their power directly from the power adapter which in turn connects to a standard wall outlet.
At this point, I was able to plug the LED sign in and see random LEDs light up, so from an electromechanical point of view, everything worked.
The biggest challenge of this project was the programming part. The microcontroller I used has very little memory, so I put quite some effort into writing efficient functions to render text or animations onto the LEDs. The code is written in C and accepts a series of high-level commands like text inputs, color and brightness choices, and animation requests which are then translated into a matrix of LED’s that is updated every frame. To interact with the LED sign, the microcontroller creates a local WiFi that people can log into and send commands.
In a first iteration, I could control the sign’s functions using a command terminal on my laptop, but this meant I had to leave my laptop out during parties and have people spill their beer on it, which wasn’t ideal. To solve this problem, I made this already big project even bigger by programming a custom mobile app people can download to control the sign. This is what the app looks like:
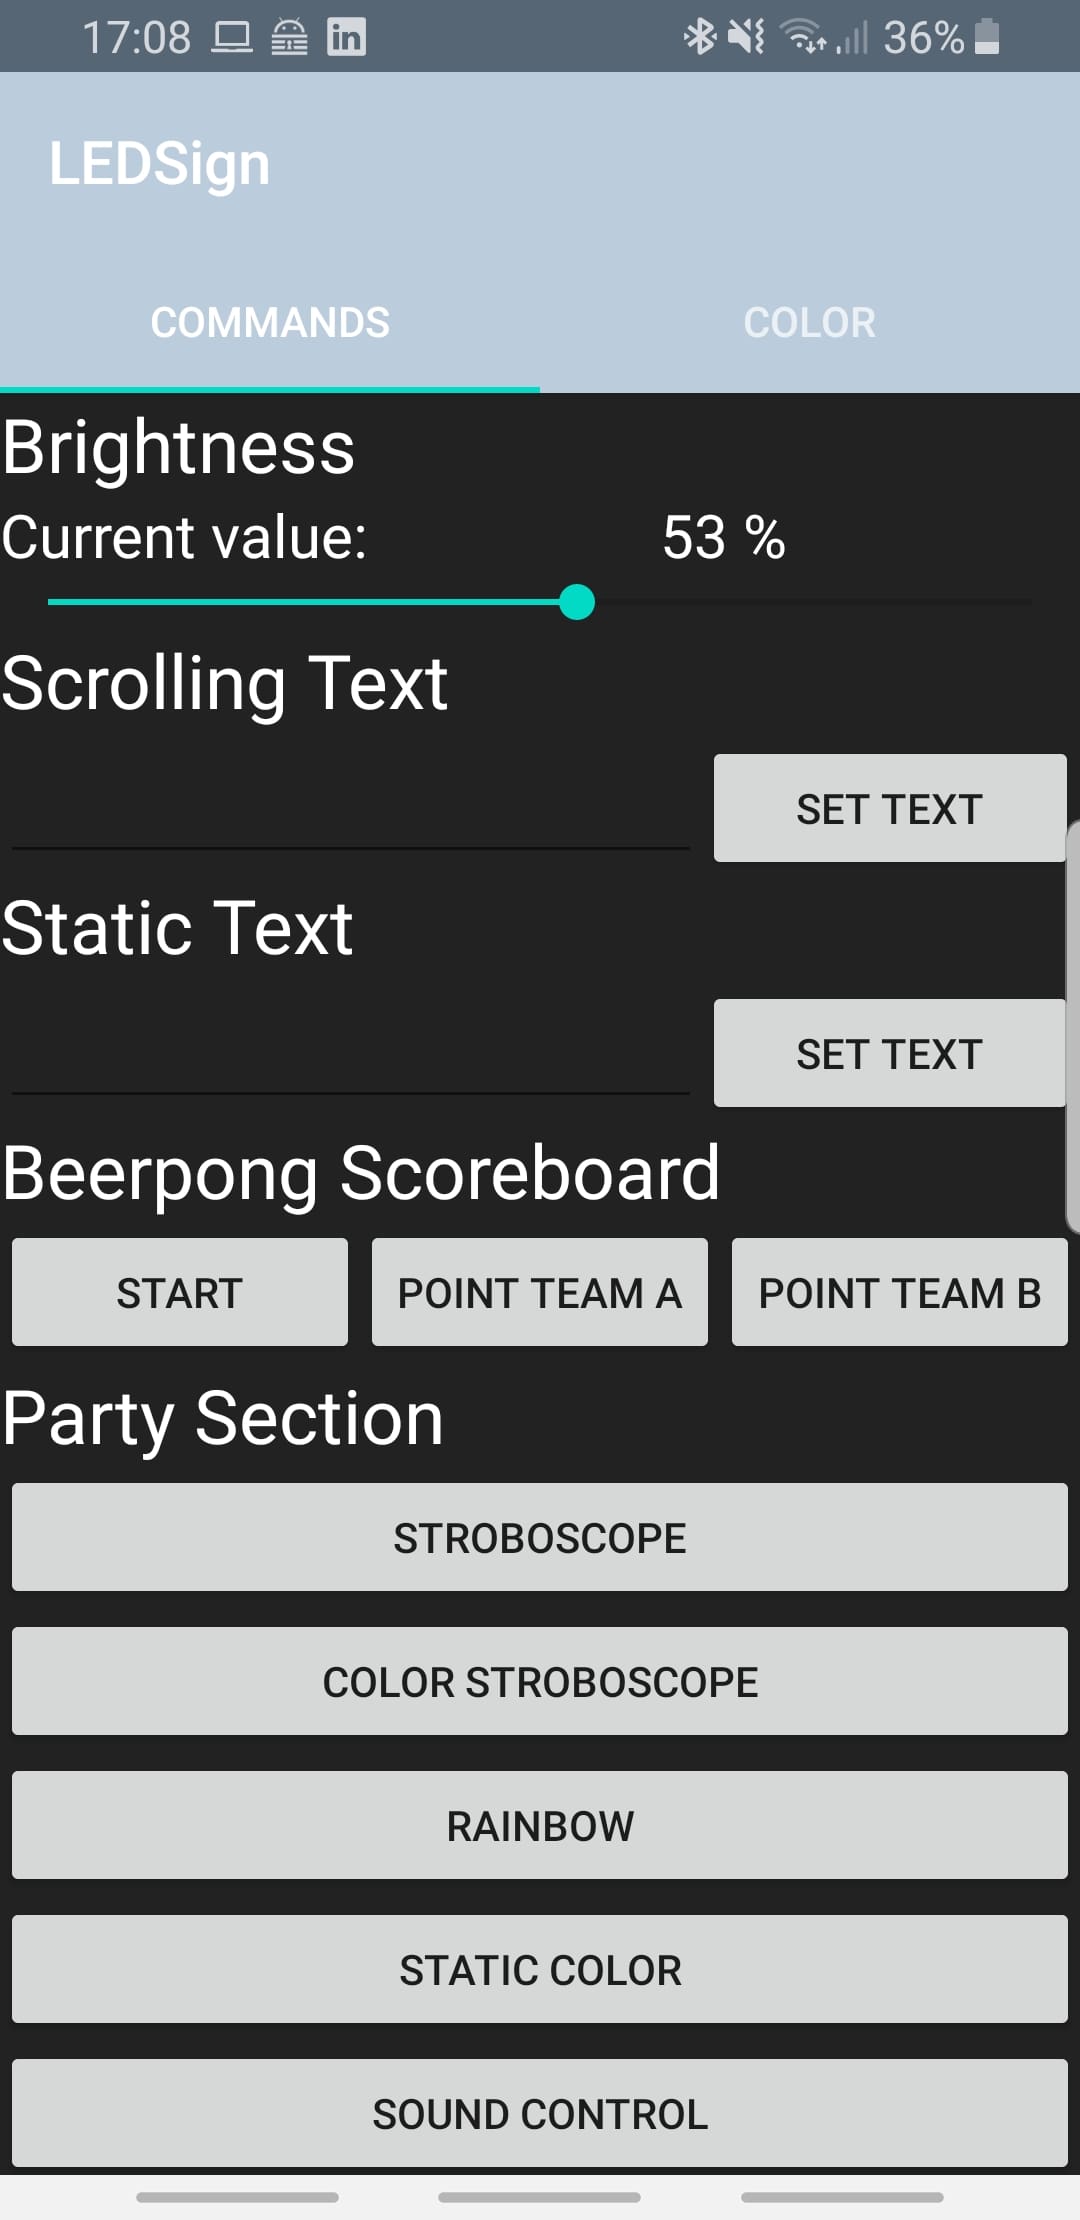
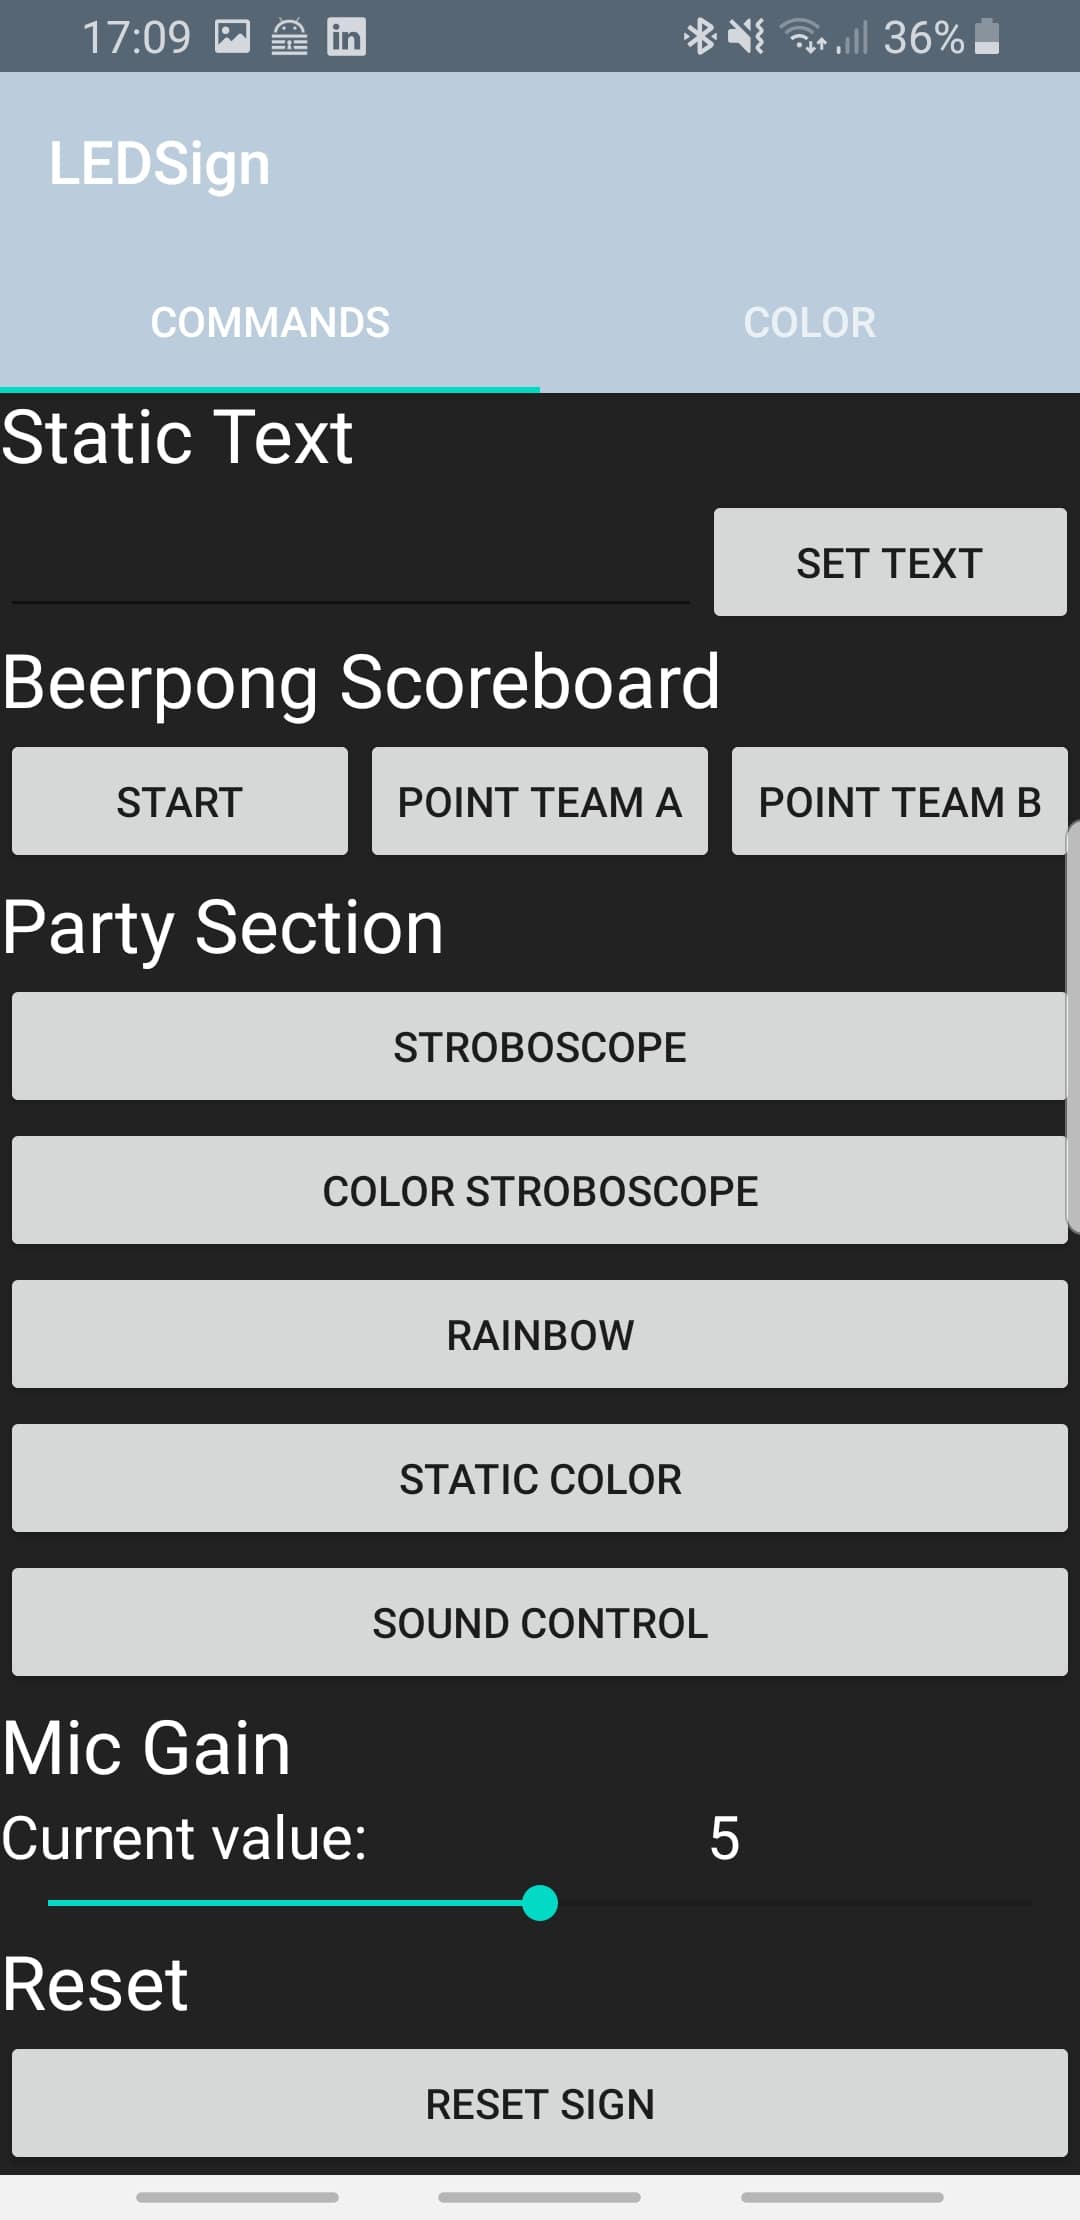
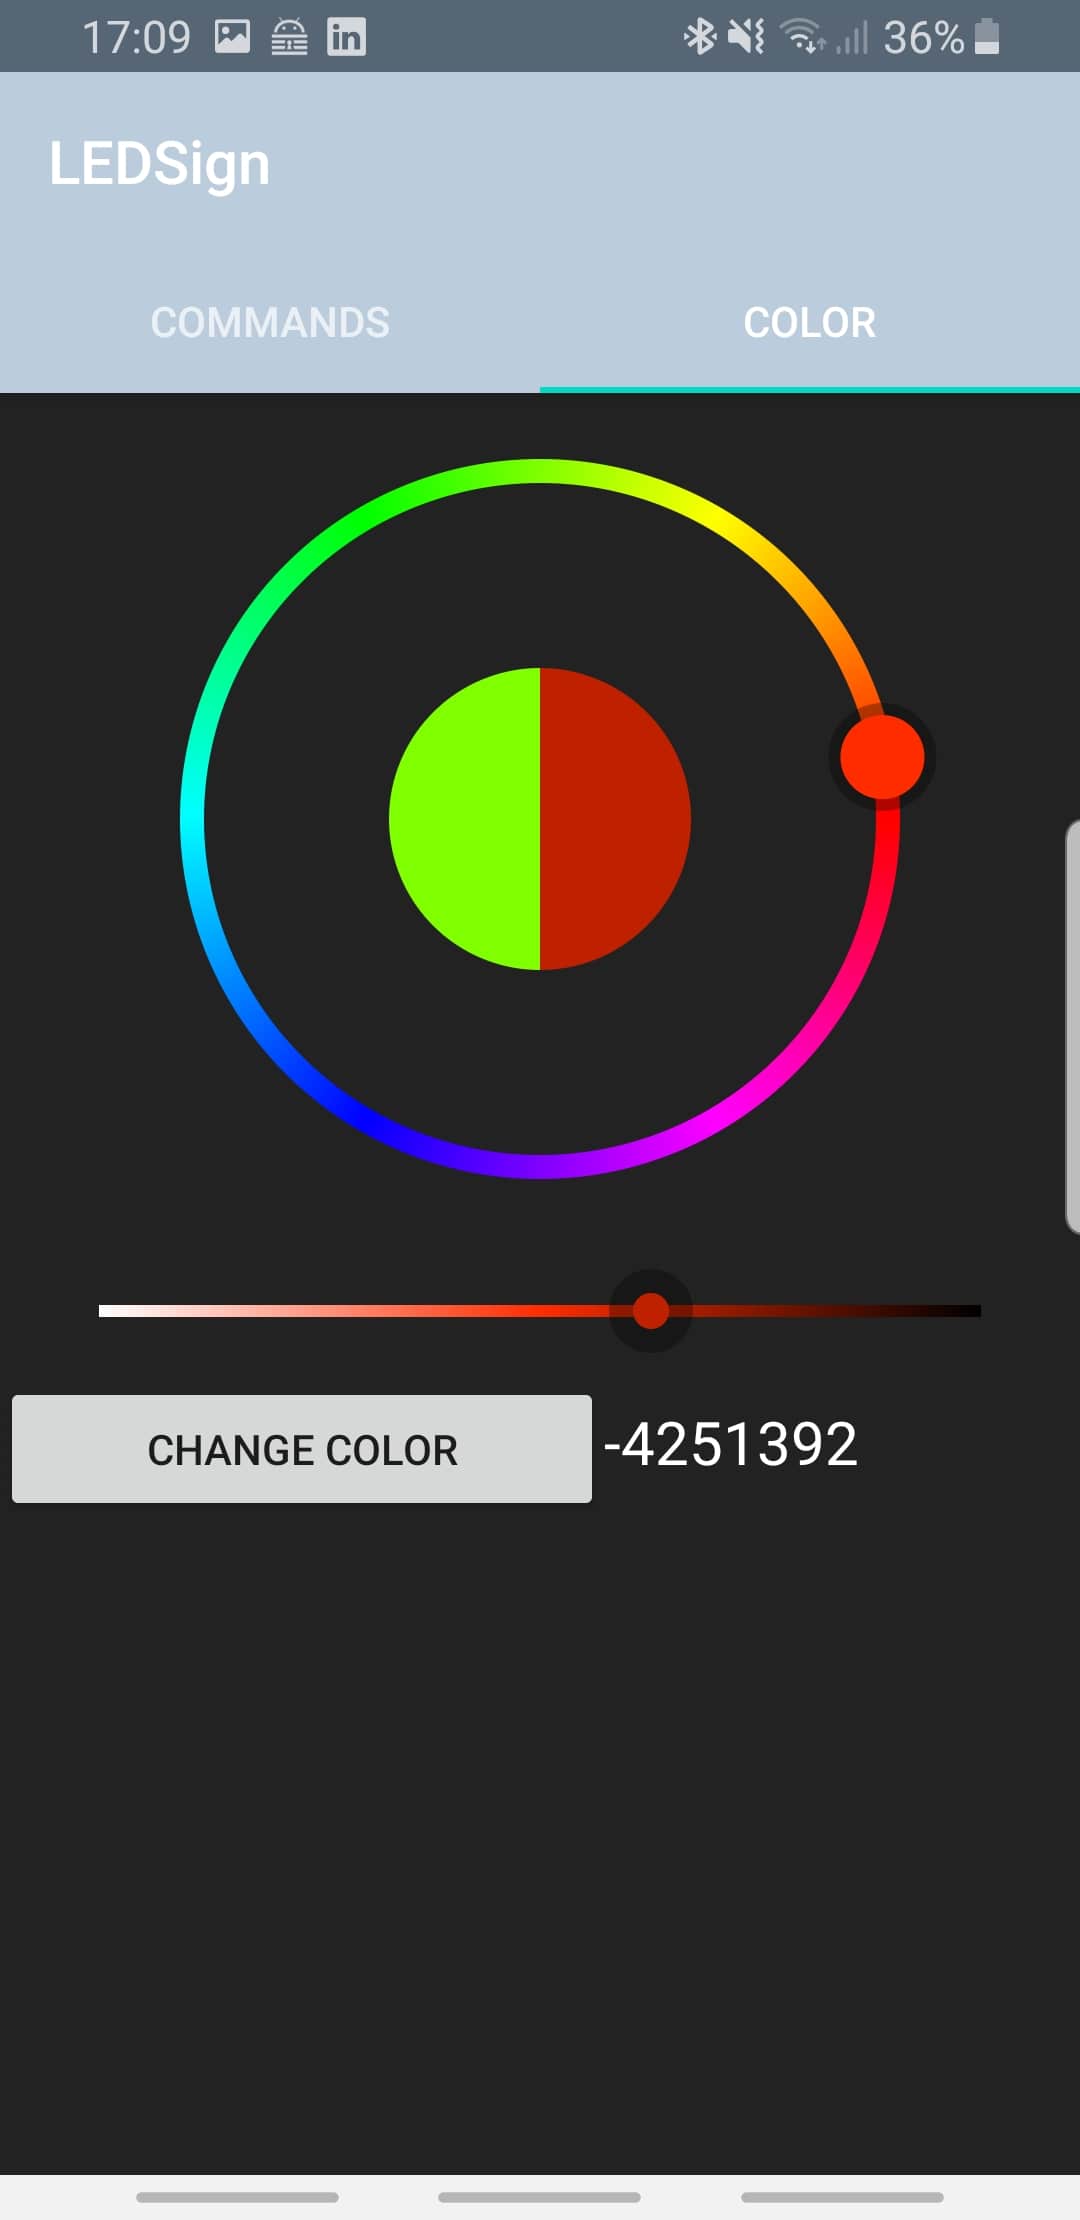
In my flat, I have a QR code on the wall that people can scan to download the app and log into the sign’s WiFi. They can then adjust brightness, choose any color they like, and display scrolling or static text, the beerpong scoreboard, or various animations and effects. Multiple users can control the LED sign at the same time and I added a microphone gain control to adapt the sensitivity according to the current volume in the room.
Just when I thought I was done with the project, I went on holiday with a frew friends and someone asked if we could take the LED sign. The idea was great, but the sign didn’t fit into my car, so - obviously - I built another one that is exactly as wide as the trunk of my car.
Because the portable sign is not as wide as the original, I added 3 lines of LEDs in height to still achieve insane levels of brightness. Only after I had build the sign I realised that this meant I had to change the code for all the animations and also re-program how characters are rendered onto the higher grid for displaying text. This caused a lot of extra work, but I ended up with my own custom LED sign controller firmware that is now fully customizable for different sizes of LED grids.
Instead of a wall mount, I added stands from an old IKEA box so the portable LED sign can be placed on tables or cupboards:
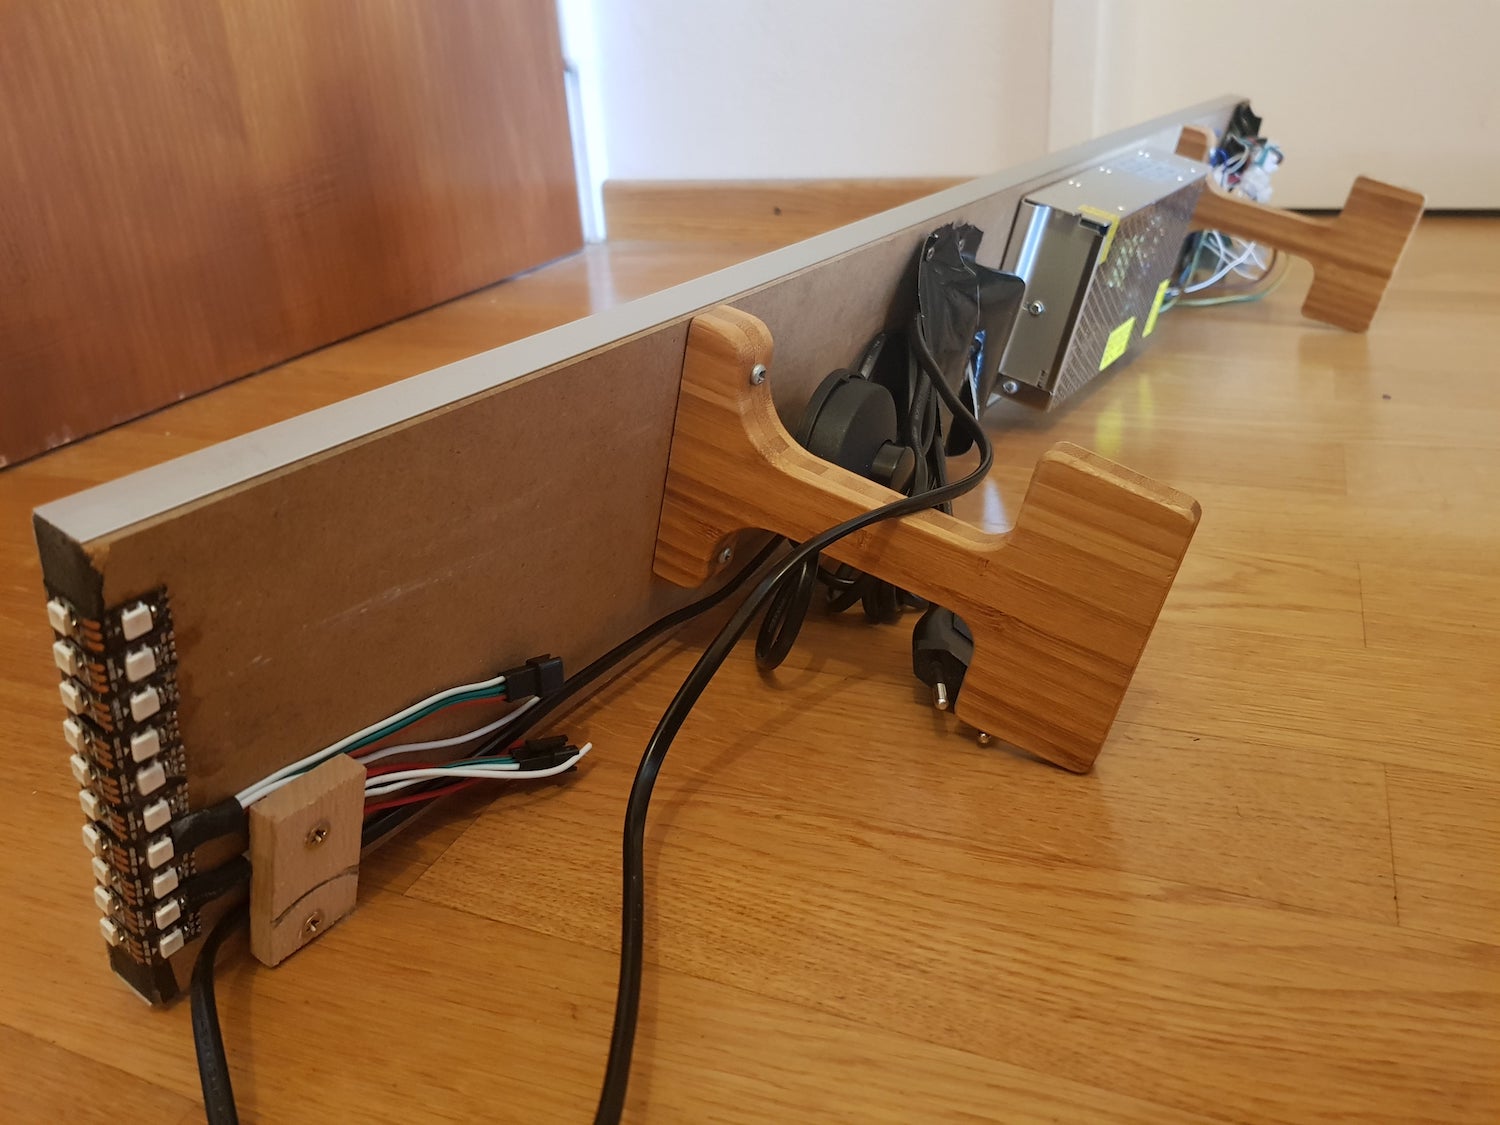
As you can see in the picture above, I also added some extra safety features such as a clamp preventing the power cables to be ripped from the adapter if someone trips over the cable.
All in all, the small side-project I started turned into a massive development effort, but I learned a lot about programming microcontrollers, building electronic devices, and developing mobile apps. Most importantly though, I now own two awesome LED signs that can turn every relaxed evening into a full-fledged club experience. And who knows, maybe some day I’ll need to illuminate a stadium or send a message to the planes flying over my city - I am now prepared.
Thanks for reading and drop me a message if you have any questions or want to build something similar yourself, I’m happy to share the firmware and my experiences!

Lars Carius
Tech entrepreneur with a passion for computer vision, augmented reality, machine learning, and simulation engineering with a Master's degree in "Robotics, Cognition, Intelligence" from the Technical University of Munich.